
What we do here
First, you get to know the acceleration sensor, then you get to build a simple game with the Game blocks available on MakeCode. Once you have mastered those to prerequisites, you continue in Part 2 to build a more sophisticated game using both accelerometer and Game blocks.
Accelerometer
For this game we need to use the accelerometer to sense the orientation of the micro:bit. The sensor and how to use it is described in the documentation. You find it under “Reference” or just click here on accelerometer.

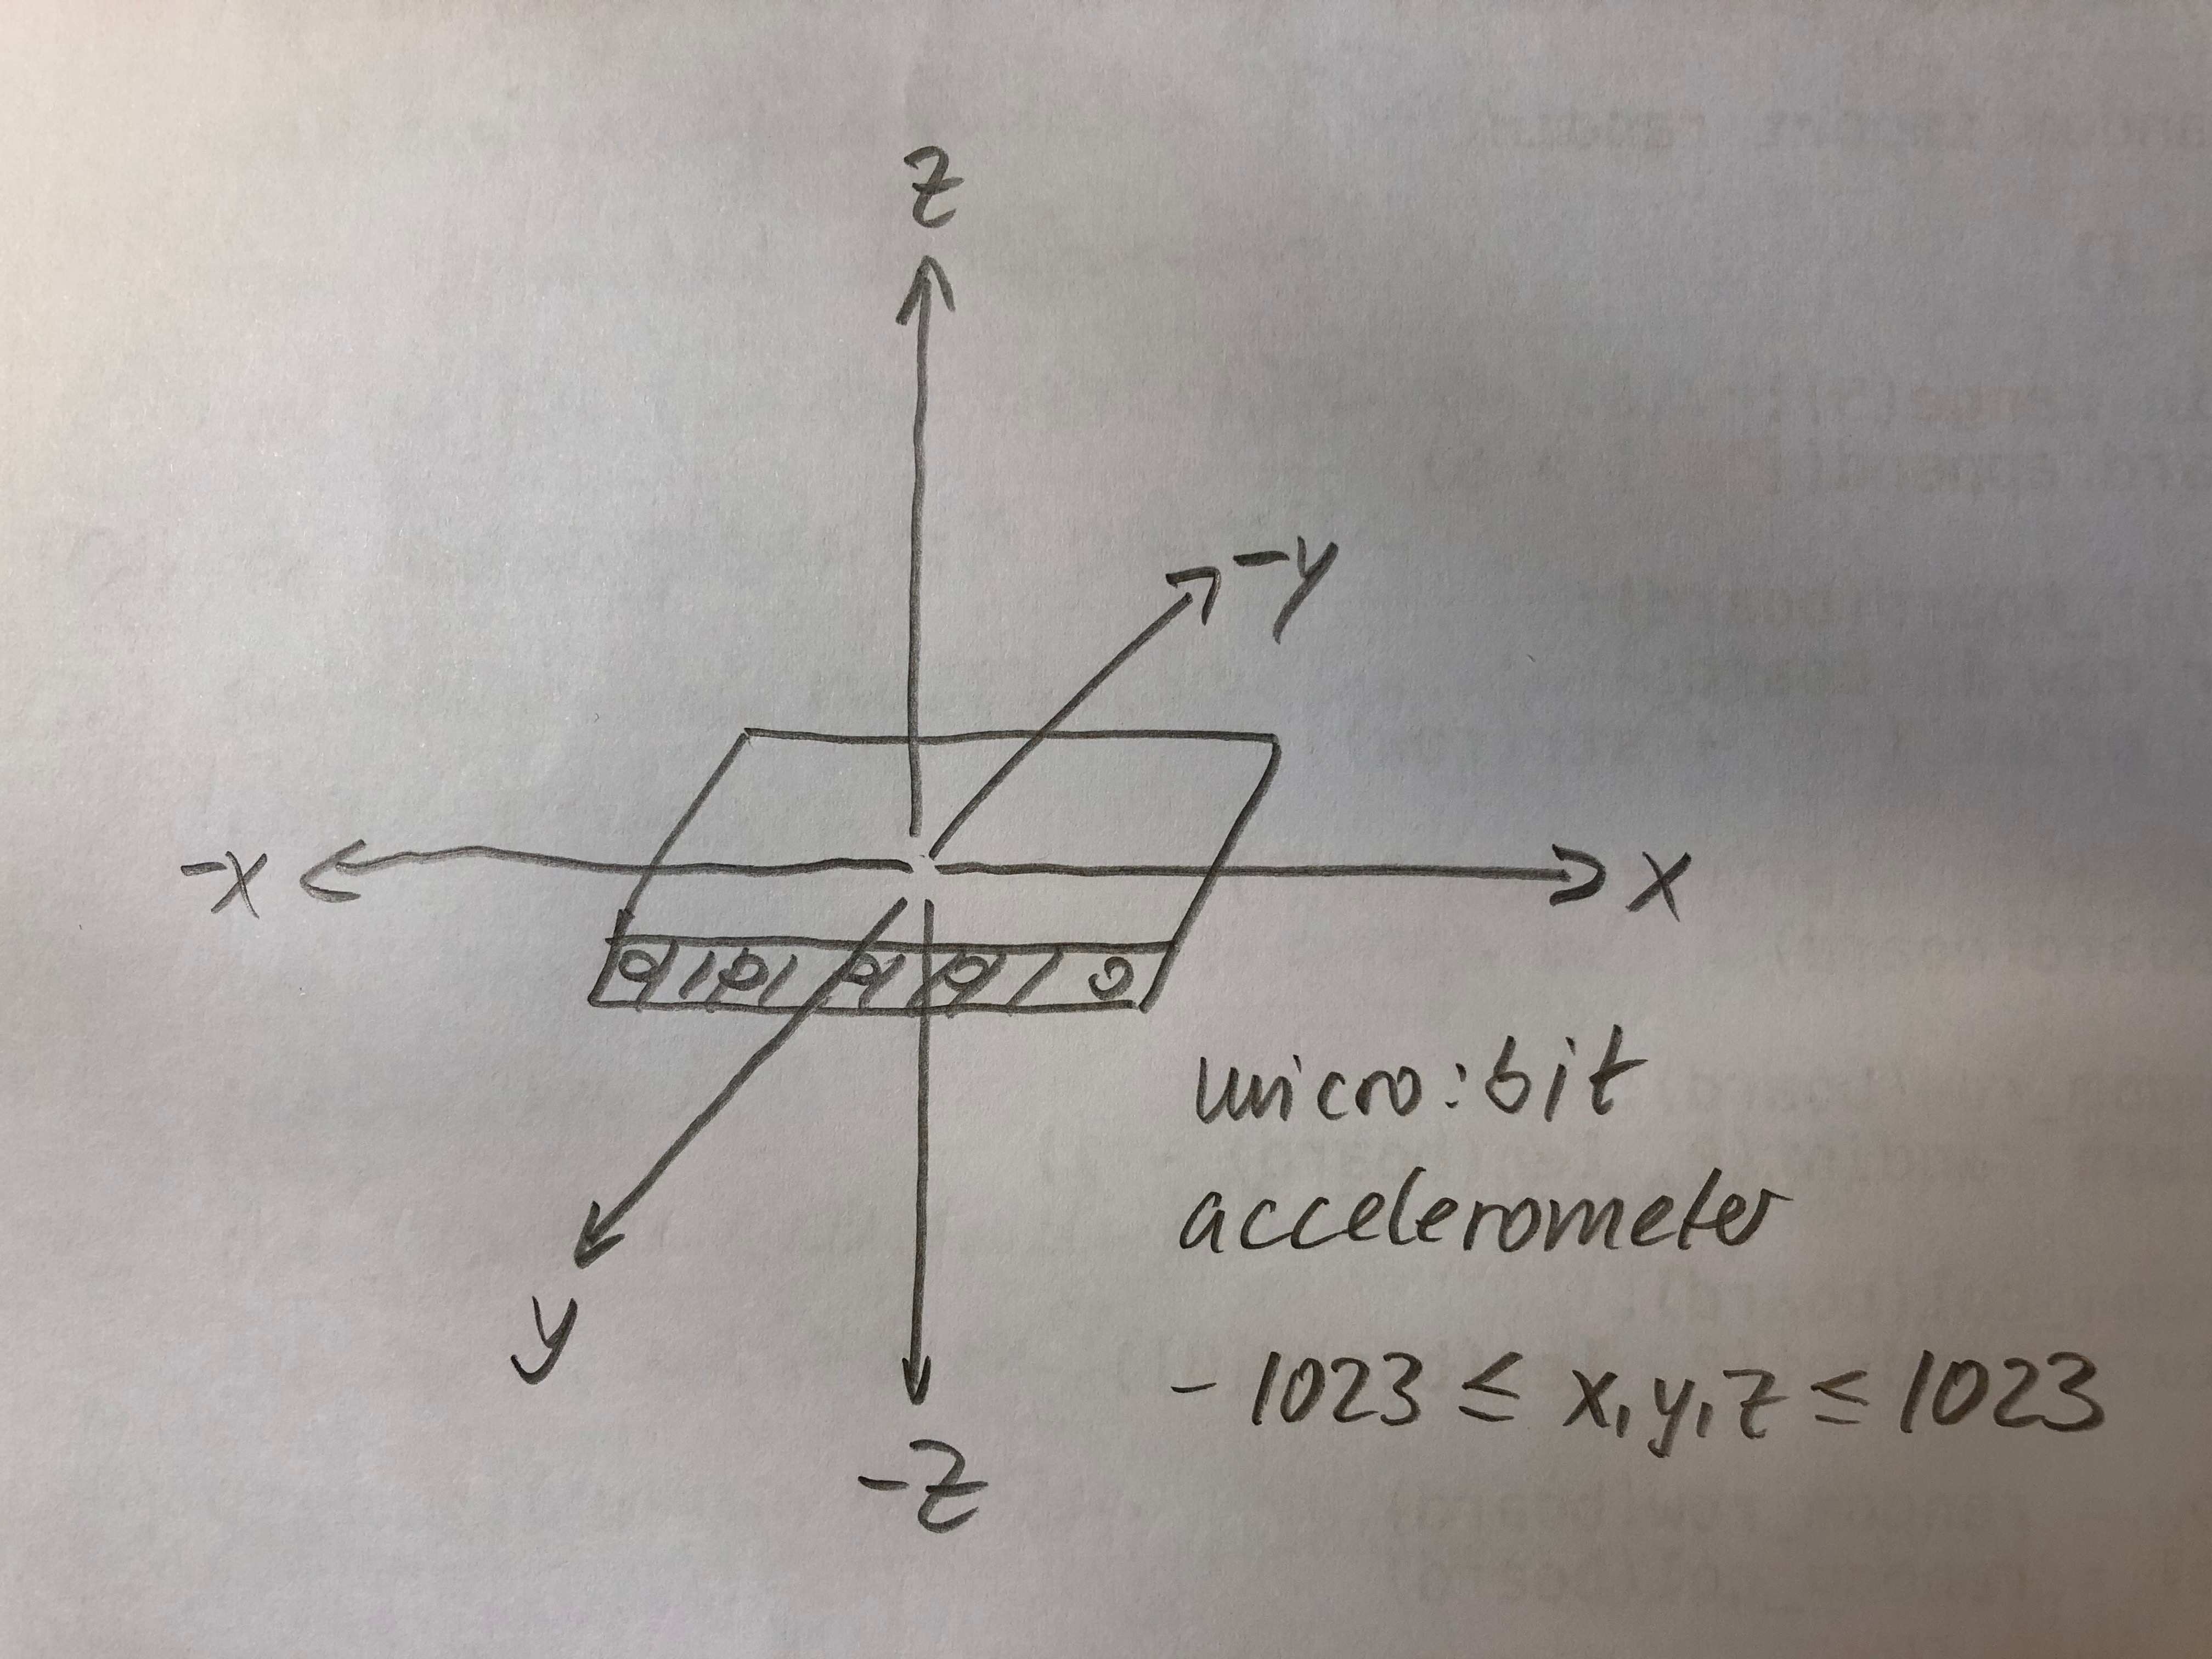
The accelerometer measures acceleration caused by gravity and sudden movements. Here is a sketch explaing about the three coordinates it uses to put the acceleration into numbers. In the centre you find the micro:bit board with the connector ports in the +Y direction. You can measure the acceleration in directions (X, Y, Z) at a time. The values have a range between -1023 and 1023, in the following game we assume for simplicity that it varies between -1000 and +1000.
Here is the link accelerometer so that you can have a look.
The documentation is interactive, so you can also upload a sketch to the IDE and run it there. Furthermore, you find examples that you can also easily transfer to the editor, no need to rebuild the projects.
ToDo: Get to know sensors and how to program them.
Get the examples running on the simulator and your micro:bit. By moving the mouse, you can simulate the various movements you can make with the micro:bit. As a next step, find the documentation for the magnetic sensor and implement a compass.
Game module
In the micro:bit editor under Advanced you find the category “Game”. It contains blocks to make small games.
The small display of the micro:bit contains 5 x 5 LEDs. In the game module you can address each LED with its coordinates (x, y). You may know coordinate systems from school, they have their origin (0,0) always at the lower left corner. In computer science we normally put the origin at the upper left corner.

Create your first game
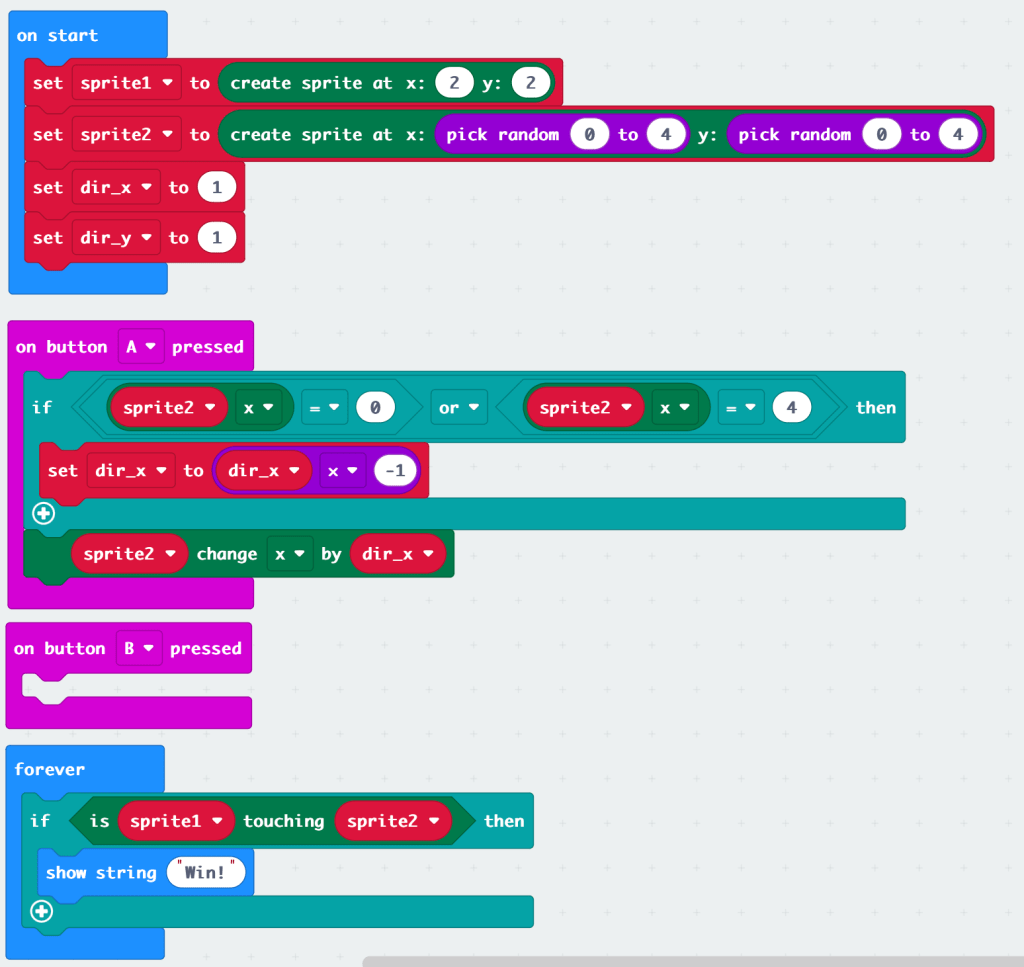
This is a simple game. It uses the 5 x 5 LED matrix and the buttons A and B. The goal of the game it is to move a randomly appearing LED with the two buttons to overlap with the LED at the centre at location (2,2). The button A controls the horizontal position of your sprite, button B the vertical position.
The code below implements the game basics, missing is the functionality for button B. Try to understand what is happening when you press the button. Then finish the game by coding the functionality for button B and test it thoroughly.
To Do:
- try out the program,
- figure out what is happening when you press Button A and
- then add the missing functionality for button B.

The post was updated in April 2024, the screenshot shows the new Makecode blocks available then. Furthermore, I also made some changes to the code.